Chatbot page bots can be hosted on your custom domain.
For example; your chatbot URL that looks like:
https://chatbot.page/PMod0ican be set to load on your website like:
subdomain.yourwebsite.comHere are the steps to follow:
Setup custom domain in Collect.chat
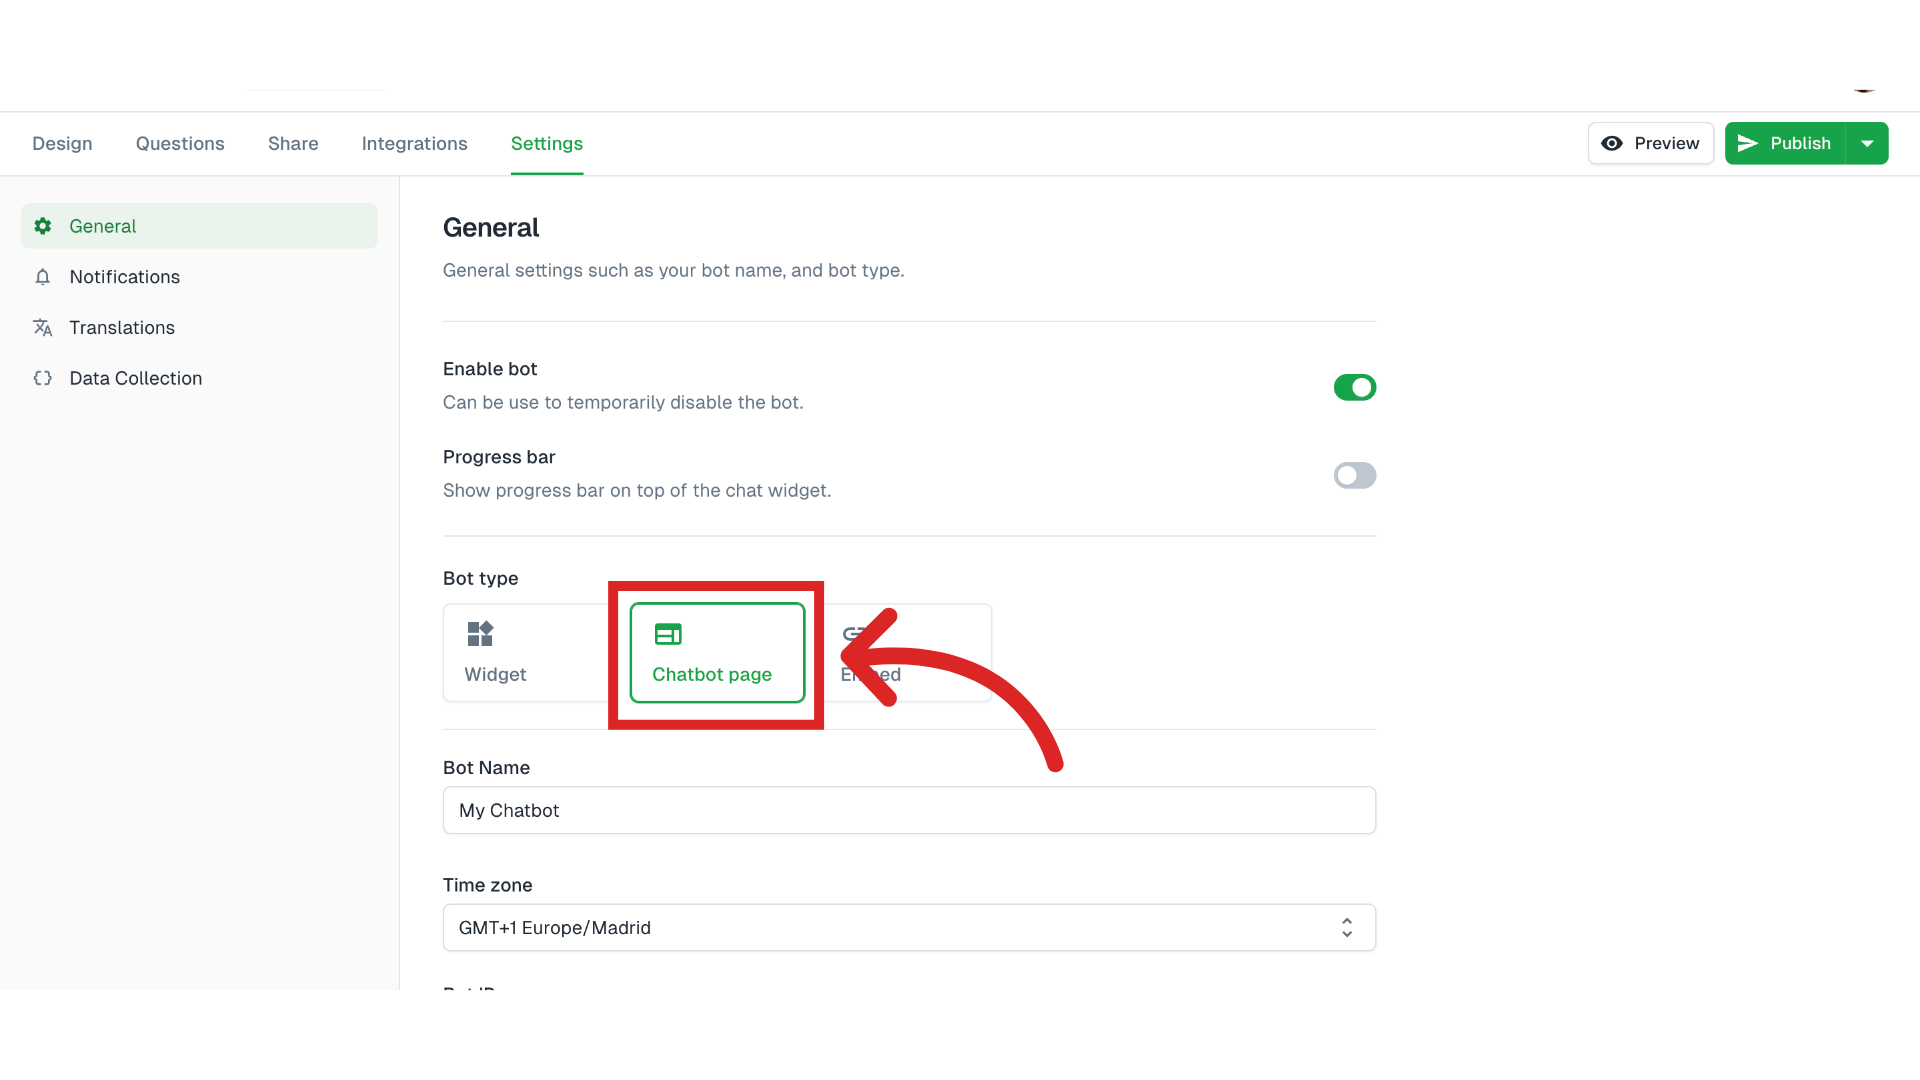
Make sure your bot type is selected as chatbot page under Settings > General > Bot type.

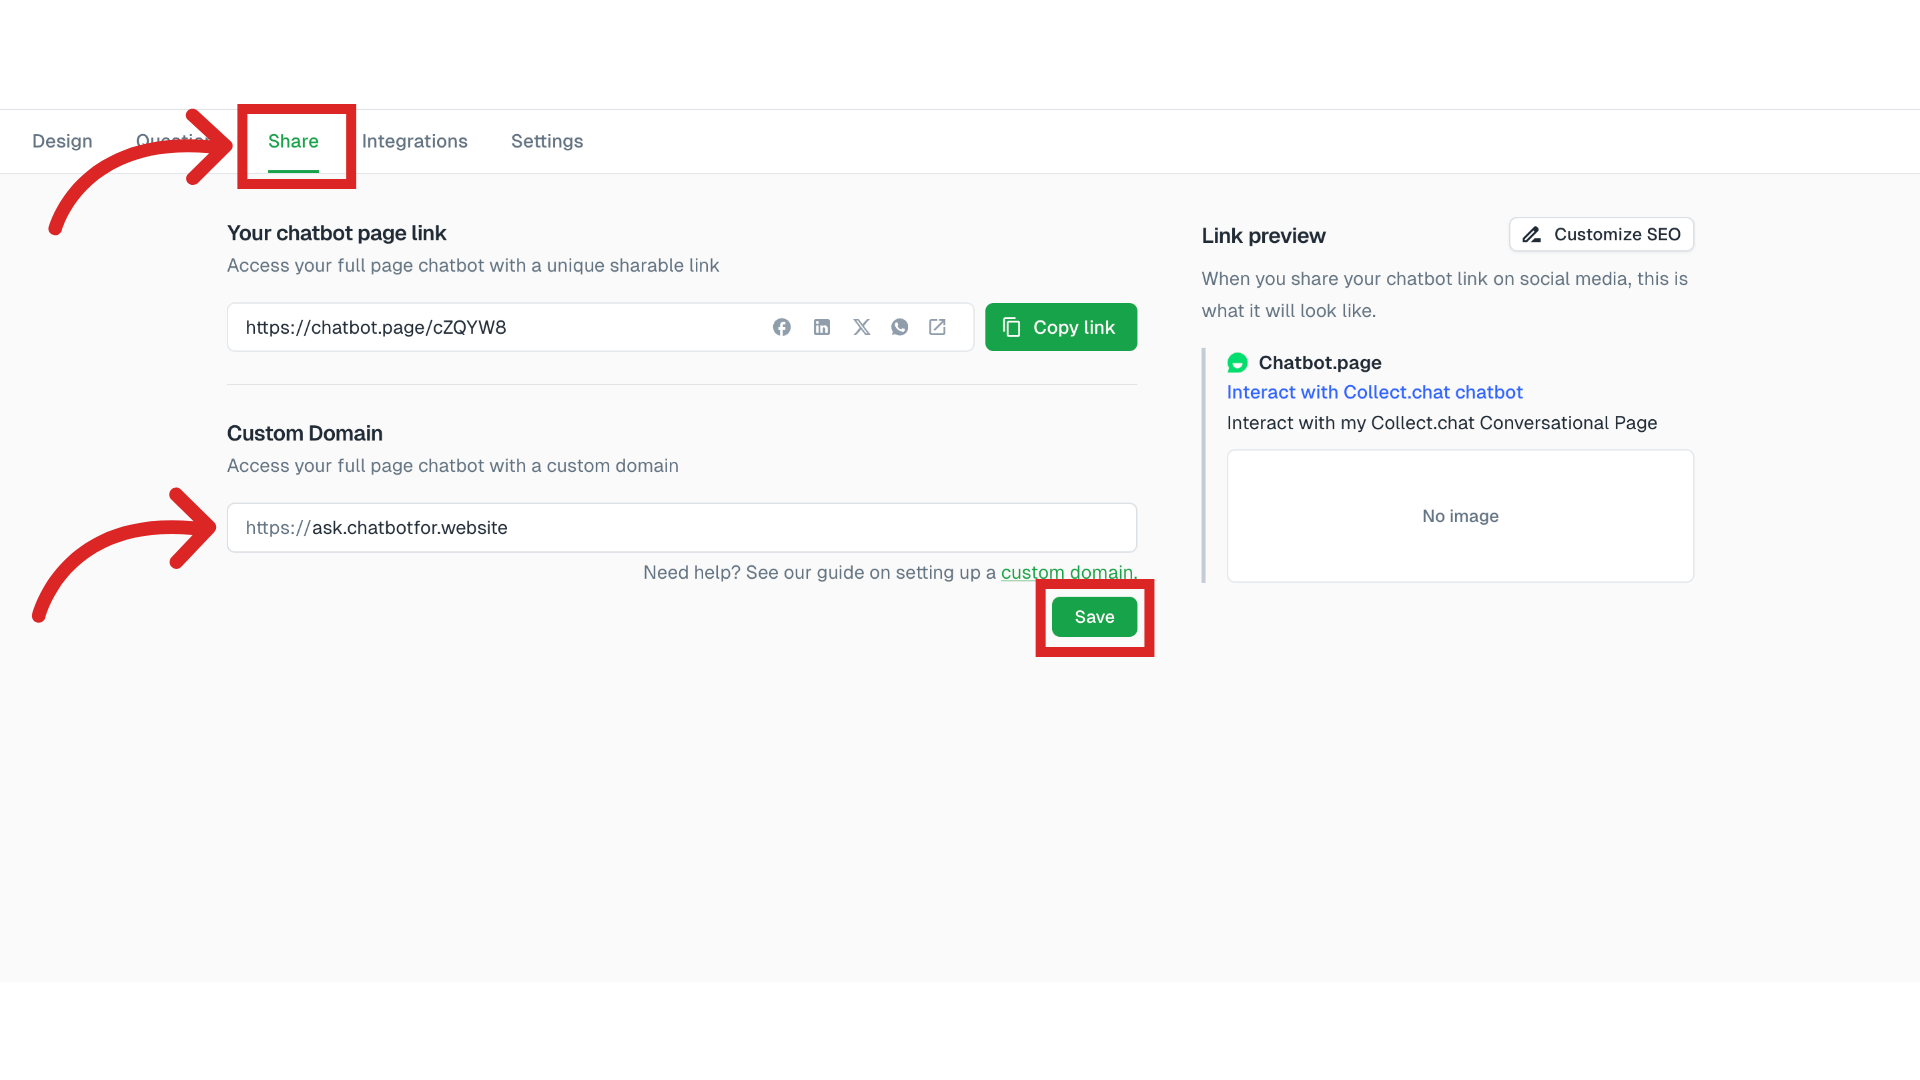
Click Share to see the Chatbot page URLs. Here you can access the Custom Domain of your chatbot page.
Type in your desired domain. Once you're done, click on save.
In this example, we are going to load our chatbot on the URL ask.chatbotfor.website.
 Point CNAME to the subdomain
This the second step. You have to add a CNAME record in your website DNS settings. Depending on your DNS provider, the steps can change a bit. Here are the instructions, if you are using GoDaddy:
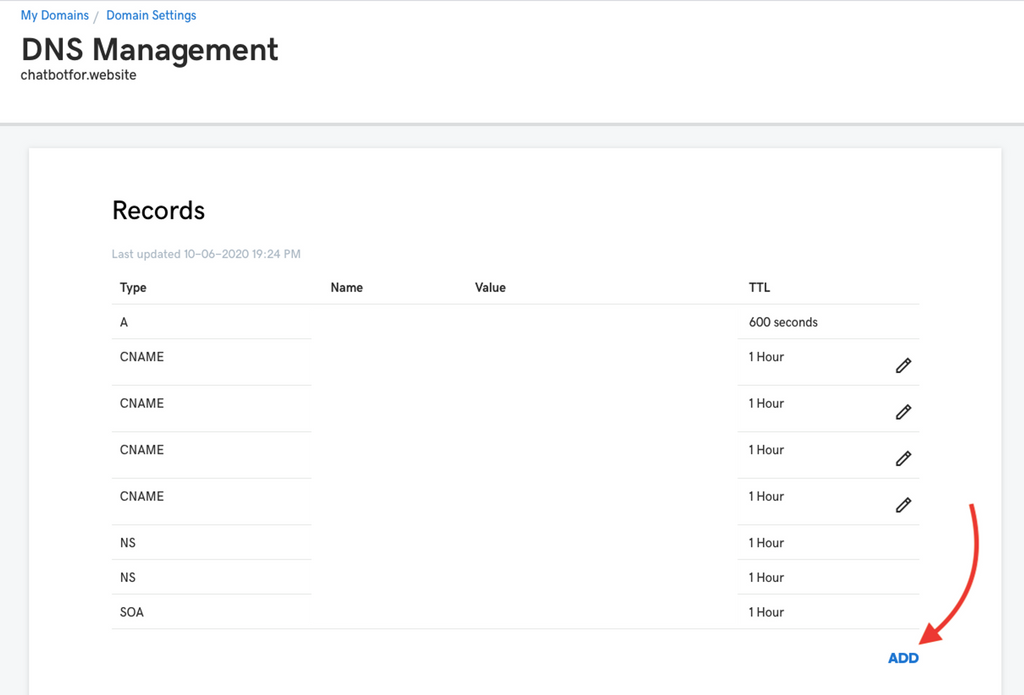
Go to my domains and select manage DNS for your website.

Now you will see all the DNS records already added. Click on the ADD button to add a new record.

Add the details.
Set Type as CNAME.
Host should be set to your subdomain name. Here it is ask.
Points to should be set to chatbot.page
Leave TTL to the default value.
And then save the record.

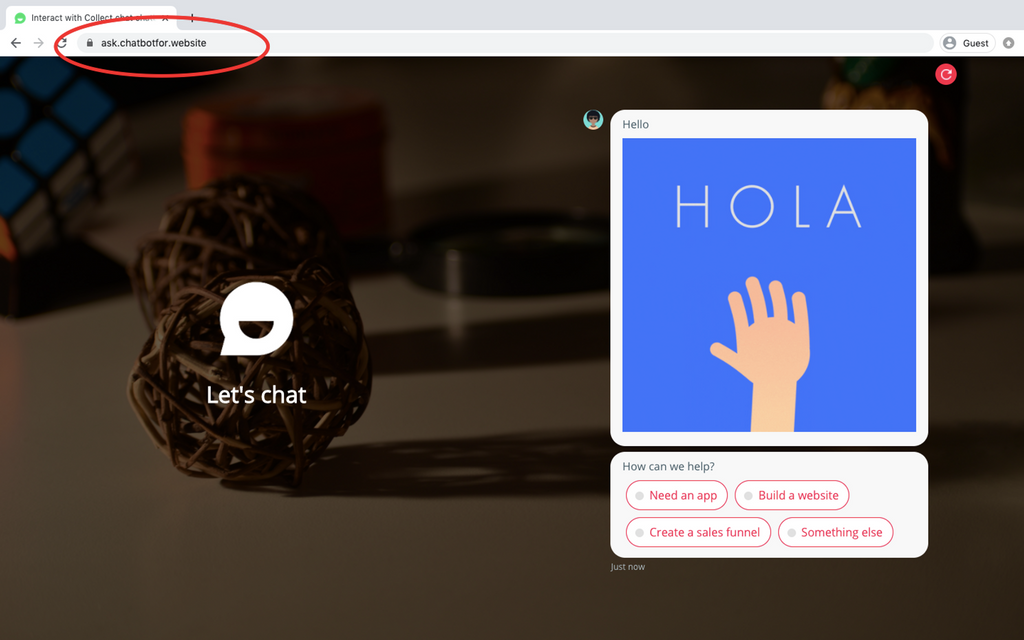
Test the custom domain
Once you are done with the setup, just test the URL on any browser.

Adding DNS record in Cloudflare
If you are using Cloudflare to manage your website DNS, then there is an additional step you need to take care of.
Click on Add record under DNS settings.

Here provide the details as shown below. Make sure that proxy status is set to DNS only. That's all.

Note
If you are not familiar with CNAME records or DNS settings, kindly get in touch with your hosting provider or web development team. They can do this for you in a minute.
We use https://letsencrypt.org/ to automatically provision SSL certificates to make your custom domain support https. By this Automated Certificate Management (ACM) service, you will be free from all the hurdles of creating SSL certificate and periodically renewing it.
Kindly consider donating to the non-profit organization https://letsencrypt.org/donate/
Tip
Please make sure you are not pointing to the root domain. If you want to configure on your root domain, please contact us for support.
Your CNAME record should point to chatbot.page.
Please make sure that in the dashboard of Collect.chat, you have added the subdomain properly.
Example: The value you should set should be “subdomain.yourwebsite.com” and not just “subdomain” or “yourwebsite.com”.
Still need help?
Contact us